Fast Cabled (Twisted) Fringe

There's nothing I like more than finishing a great scarf with cabled fringe--it gives the scarf a very finished look, I think, far different from plain fringe.
I made about a half dozen scarves with cabled fringe this summer, painstakingly twisting each fringe by hand until it doubled over and twisted into itself. My hands were numb and stinging by the time it was finished, and it took forever. I normally use up about 120 yards for two fringed scarf ends.
I kept meaning to order a yarn twister online, but somehow forgot each time I got lost in lust shopping for yarn, far more interesting to look at! And each time I had to twist fringe, I'd dope slap myself for forgetting to order an inexpensive fringe twister online.
I'm finishing up a scarf today, which will be going out in the mail this weekend, and all that's left is blocking and putting on the fringe. Of course, I still don't have a yarn twister, so I tried improvising in order to save the hours and hours of hand-twisting each fringe.
I stuck an end of my doubled over 30 inch piece of yarn onto my yarn winder, taped down the end to the winder head, since I didn't want to wind the yarn into a ball. I then started cranking, and held the other end of the yarn up so it wouldn't automatically wind into a ball.
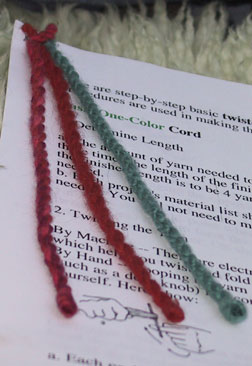
VIOLA! 30 seconds later, I had a perfectly twisted fringe, 7 inches long! I quickly made a dozen more fringes the same way, and it worked splendidly.
Just wanted to share that little discovery/tip for those who would love to do cabled fringe, but don't have a fringe twister (looks like a roach clip from the 60's!) and don't have the time or patience to twist by hand. If you have a ball winder--any brand will work--then you also have a double duty piece of equipment on which you can wind perfect cable fringes in a hotflash!
posted by Debi at 1:04 AM
![]()


4 Comments:
I haven't tried it but what about attaching said "roach clip" to an electric screwdriver or drill and giving that a whirl so to speak?
Laura
Thanks for the tip! How do you attach a twisted fring to the scarf - I have never done it before.
celia
Ah... that's how its done. Brilliant.
And the scarf... FANTASTIC! Your pal is going to LOVE IT.
Hi Thistle! Yep, using an electric anything that revolved will work. I just used what I had on hand, as my yarn winder is always set up and ready to boogie. What? Doesn't everyone use yarn winders and swifts as decorating accents in the living room?
Celia--wow, I can't believe you've never done twisted fringe--I thought you'd done EVERYTHING! After twisting, you'll grab the twisted yarn in the middle, and use your hand to allow both ends to twist together, smoothing it out with your hand. Then use the loop end to put through the scarf and pull other end through, just as you would normal fringe. The knot will be on the bottom of the fringe. Clear as mud?
Dorene, Dorene, Mozart---this is ONE way it's done--there are many, and no right or wrong way. I just use what's easiest for me. And ahem....the scarf in the picture isn't the one I'm sending to my ISE3 pal! I just keep posting different pictures to keep her guessing. Thank you for your lovely comments--as always, you make me feel much more competent than I actually am.
I'm feeling guilty because no way anything I make can match the incredible Estonian shawl you made me for this exchange, which I'll treasure and pamper forever and ever and ever.
Post a Comment
<< Home